Friday, December 30, 2011

Korker Bow

 
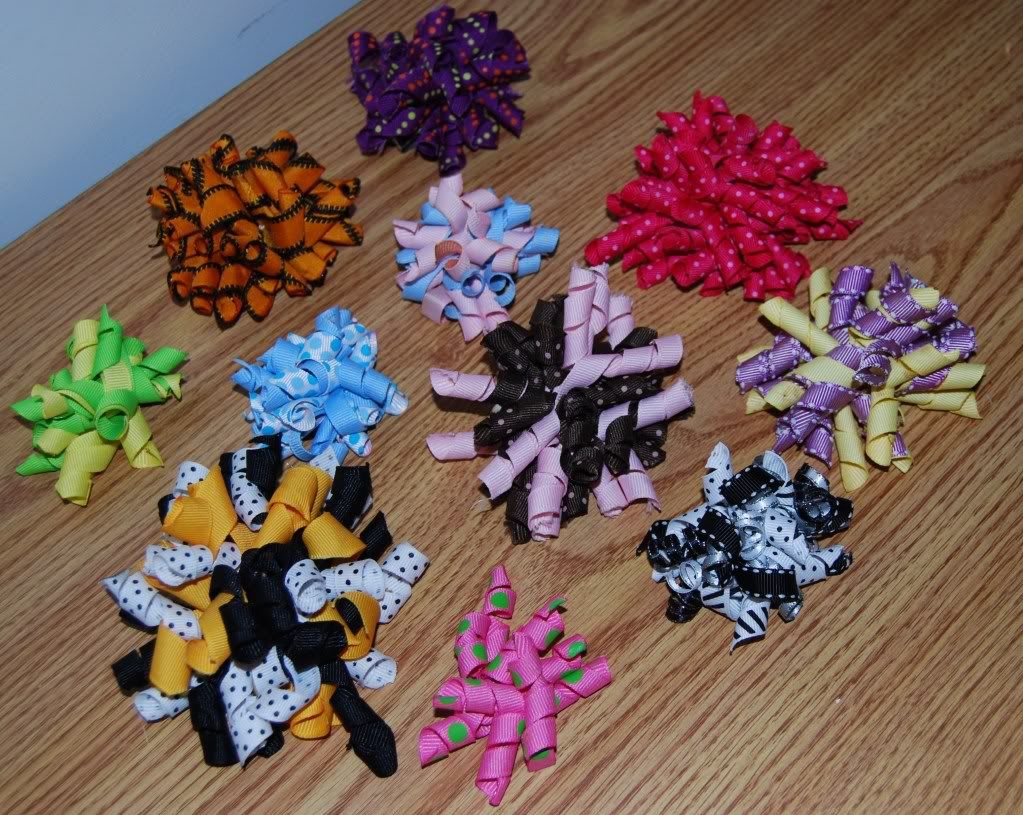
These korker bows are so much fun for any occasion and so easy to make. My 8 year old daughters are able to make these with only a little assistance from me. This one is being made for New Years.
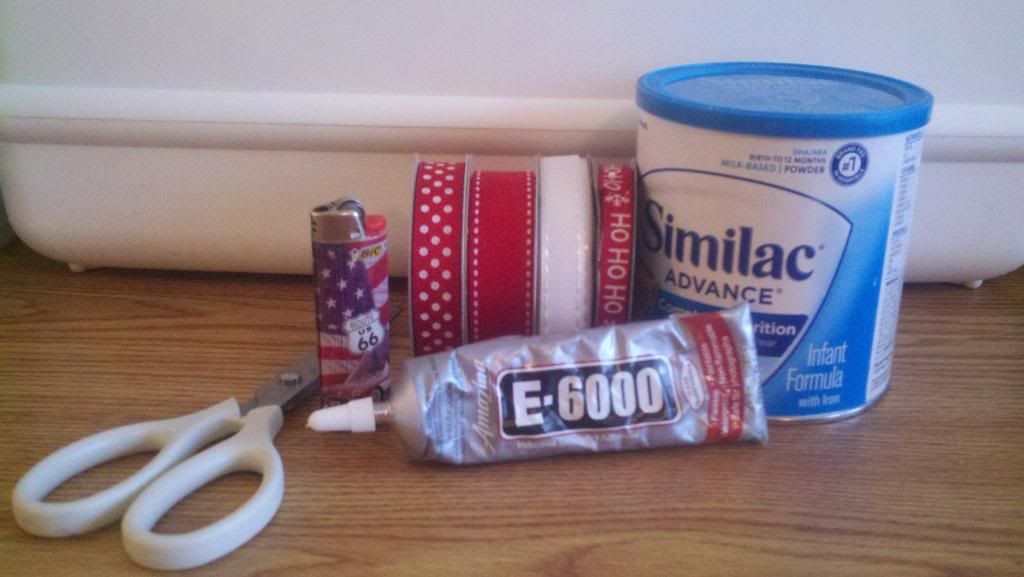
Supplies Needed:
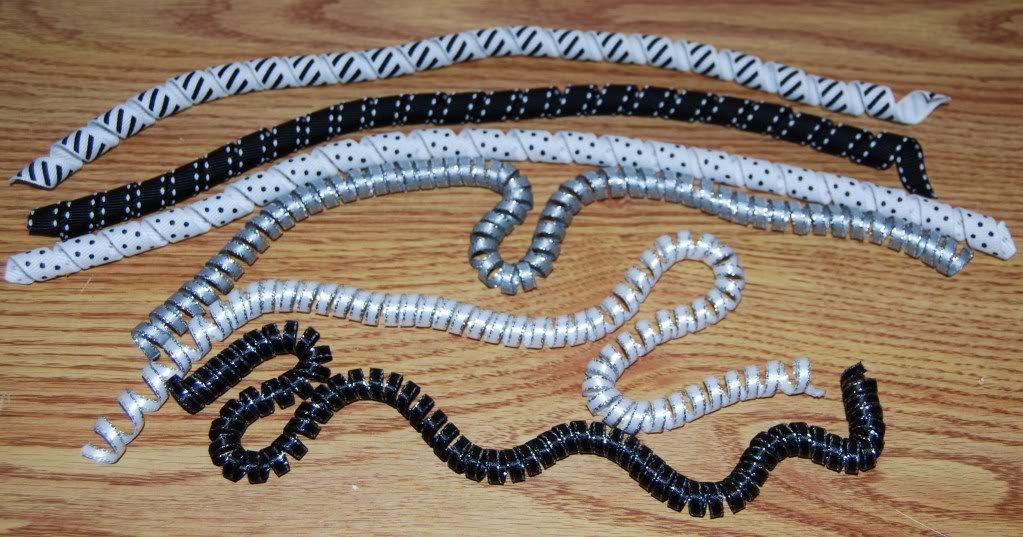
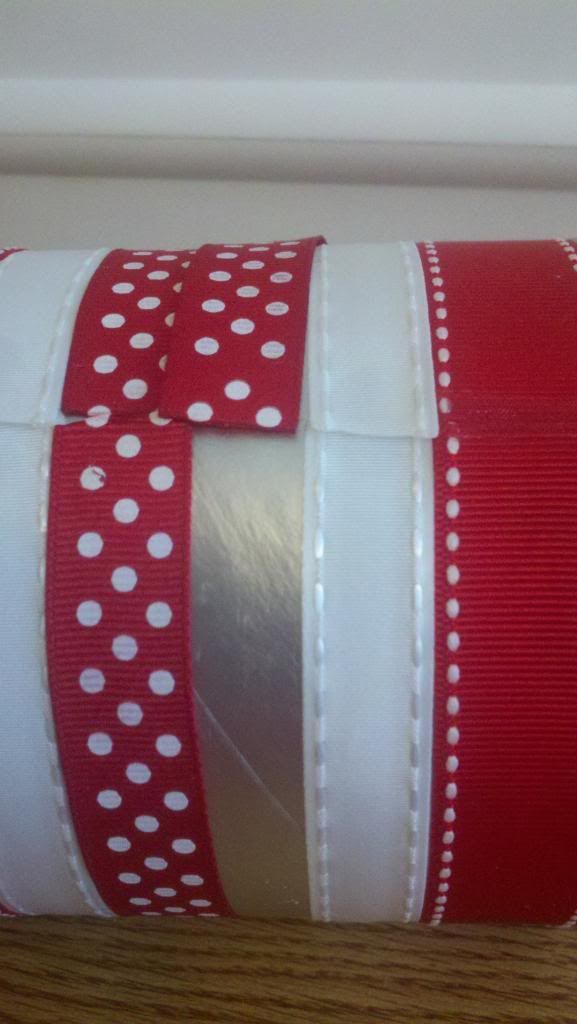
Ribbon. 3/8” grosgrain works best. I used some ¼” satin ribbon and I liked that way that turned out too.
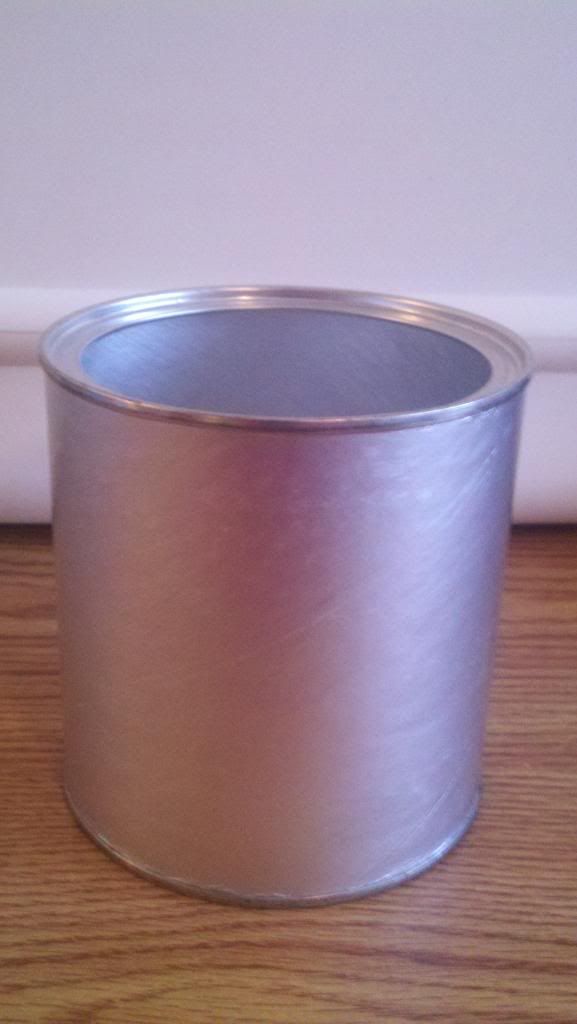
Wooden dowels. (I think mine are ¼” and 12” long)
Wooden clothespins
Scissors
Lighter or clear nail polish
Needle and thread
Lined alligator clip
Oven
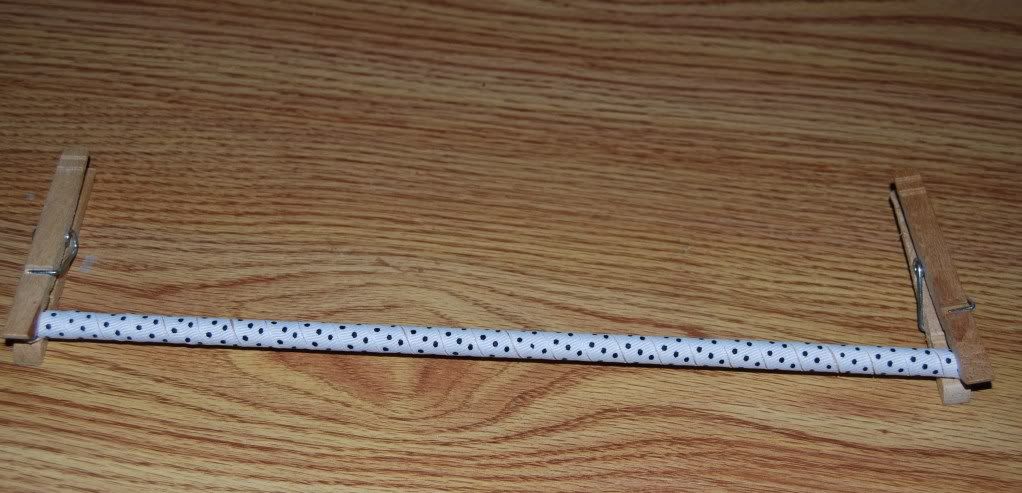
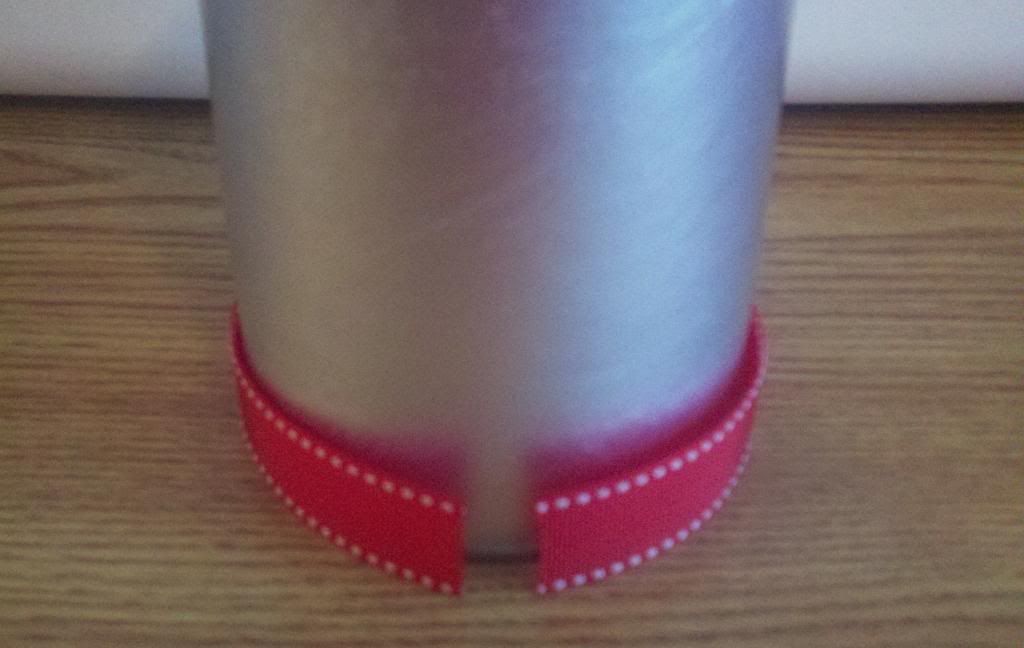
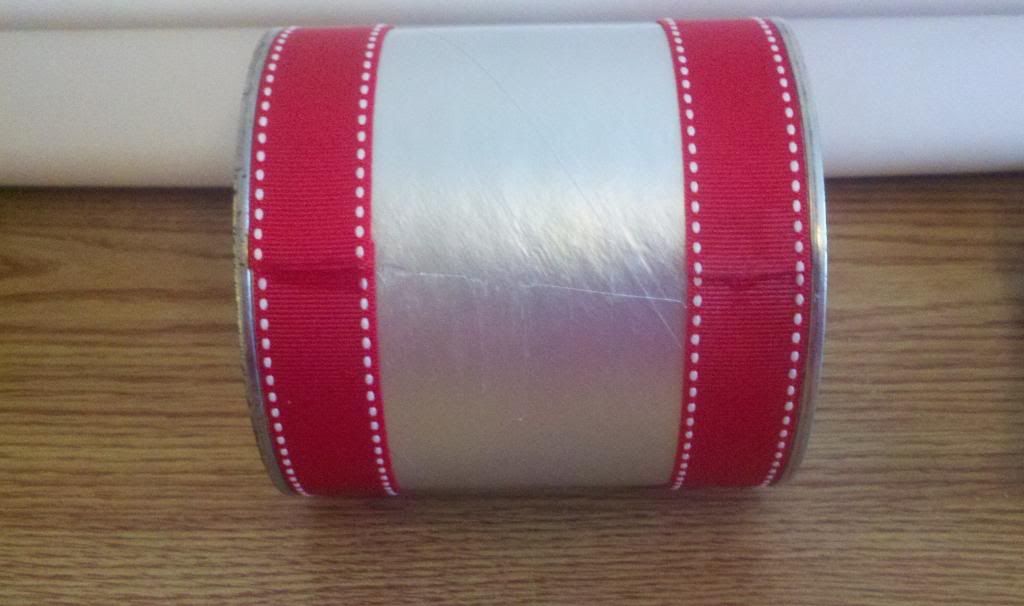
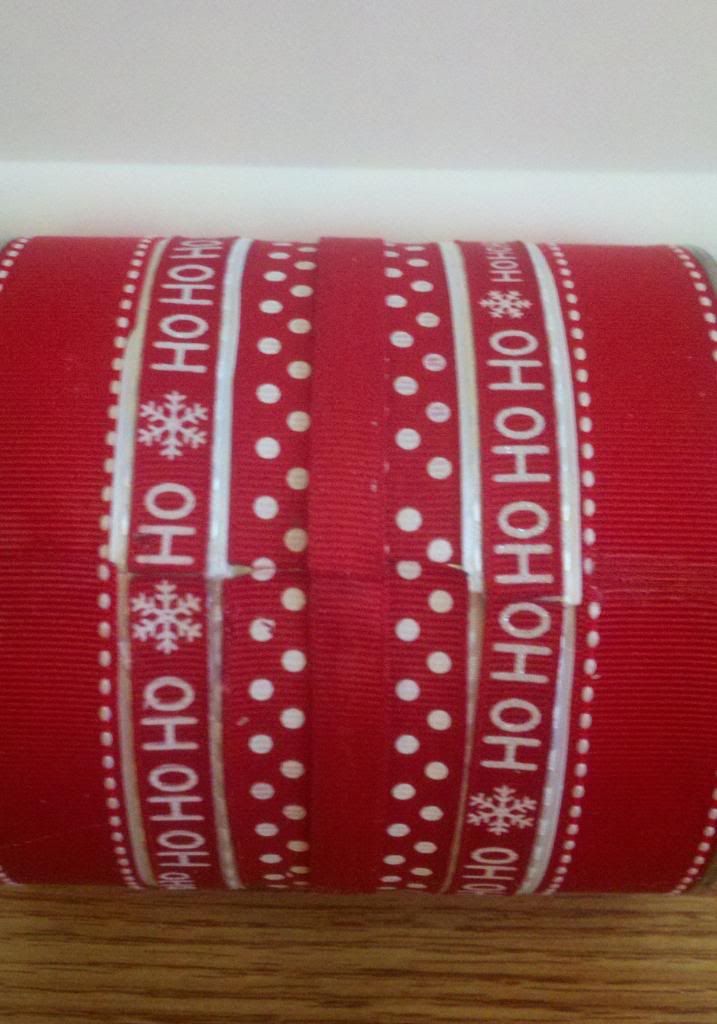
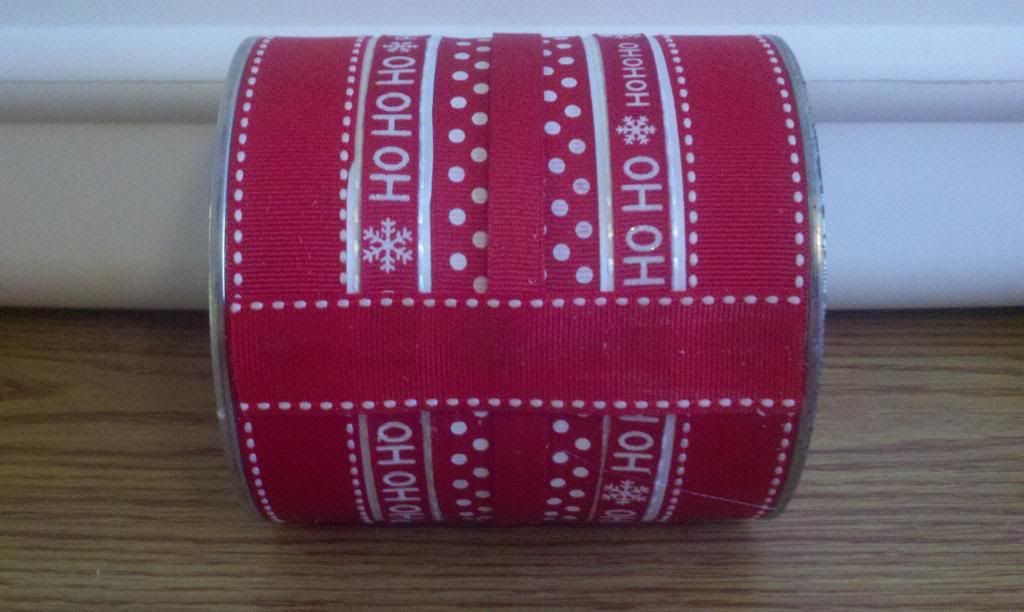
Step 1: Preheat oven to 275 degrees. While oven is preheating wrap the ribbon around the dowels holding it in place at the ends with a clothespin. You want the edges to touch but not overlap. I chose six different ribbons and wrapped one dowel with each.

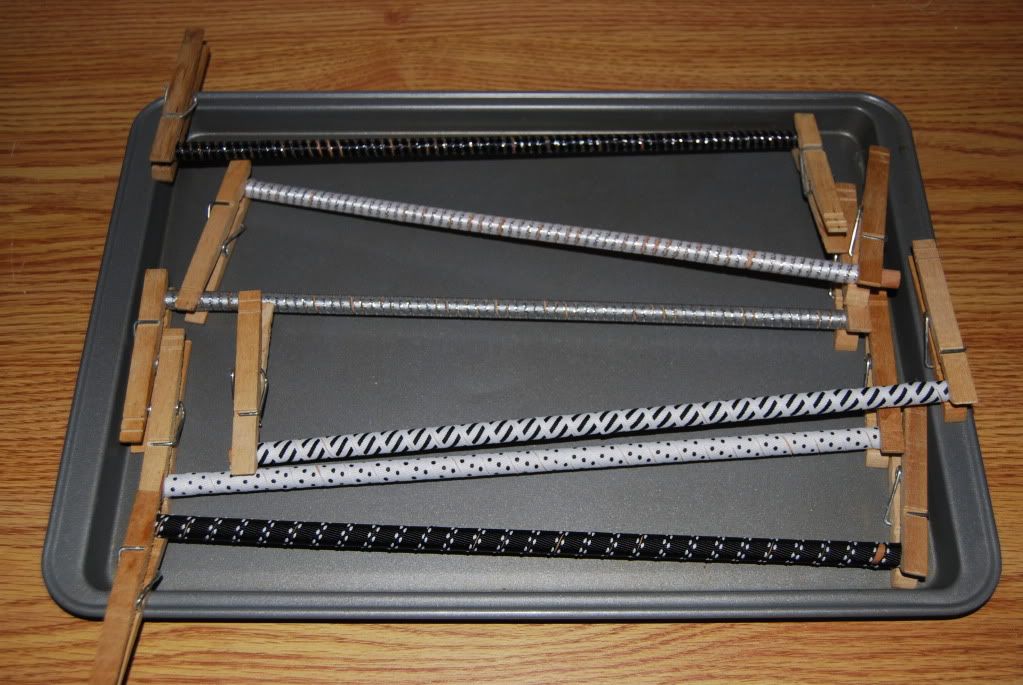
Step 2:  When done wrapping the dowels put them on a cookie sheet and bake them for about 25 minutes.
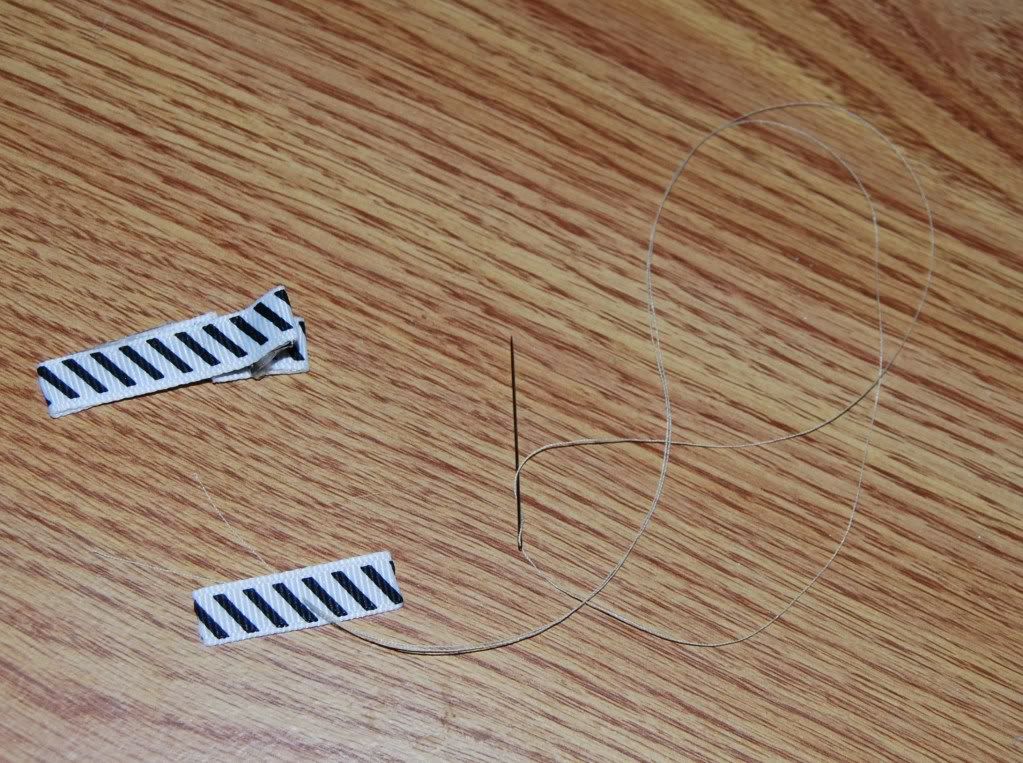
Step 3: While they are baking line an alligator clip or two if you are making a matching set for pigtails. Also thread your needle. I cut about 12 inches of thread and tie both ends together after threading so it is twice as strong.
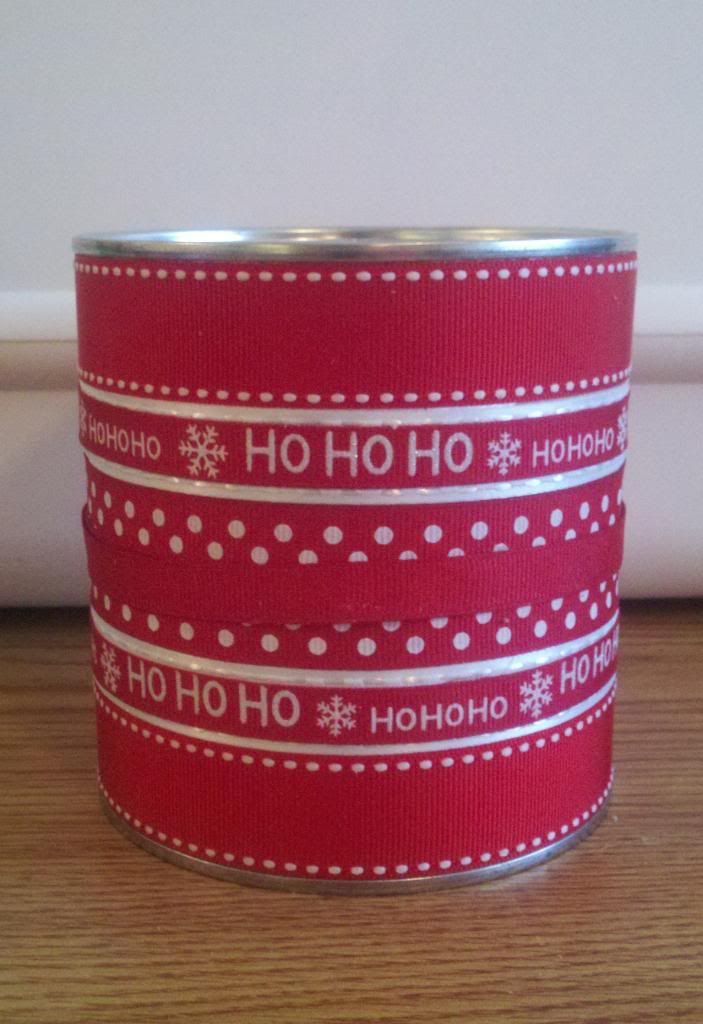
Step 4: Take out of oven and let cool. Once they are cooled down remove the clothespins and they should easily slide off the dowels.
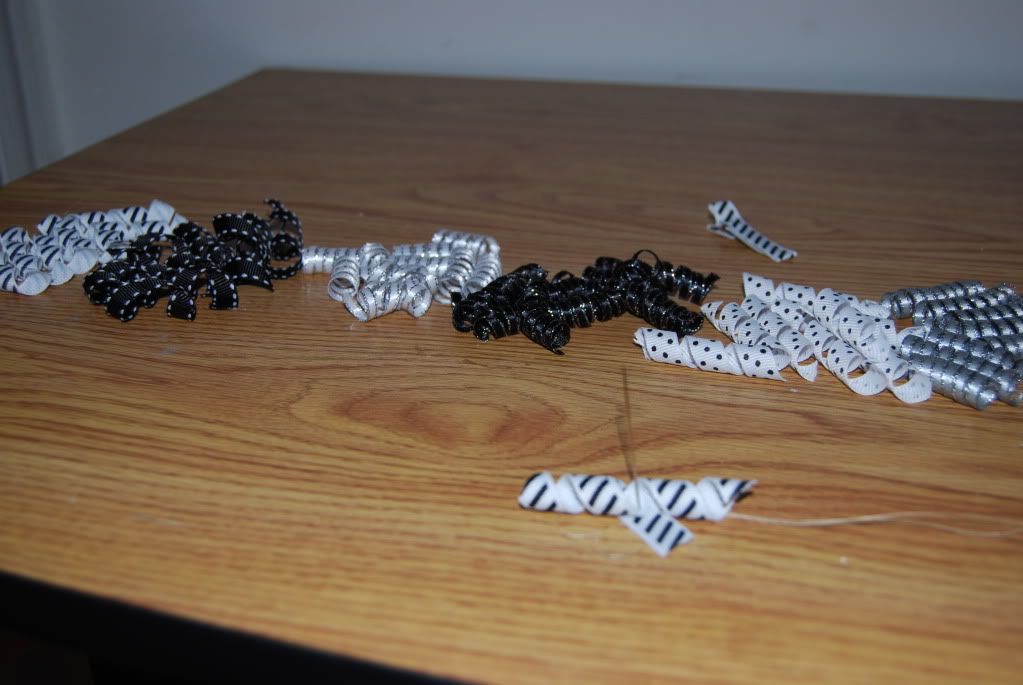
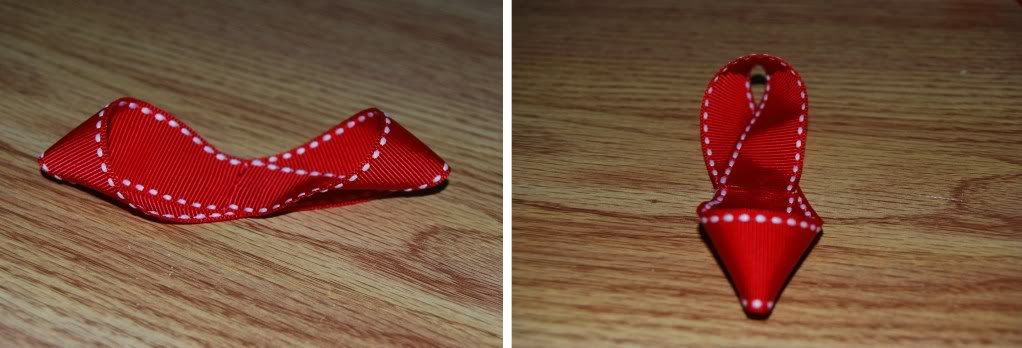
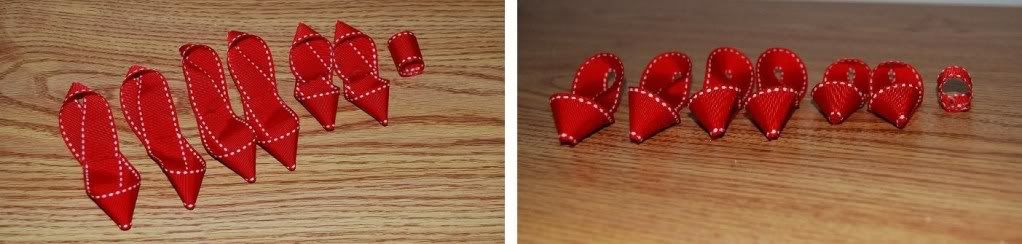
Step 5: Cut and seal the ends. The length and number of strips you will need varies according to what size and how full you want your bow.  I went with 3”.  Heat sealing the ends with a lighter is a little more difficult because of the ribbon being curled so when my daughters make them I just let them paint the ends with a little clear nail polish to keep the ribbon from fraying.
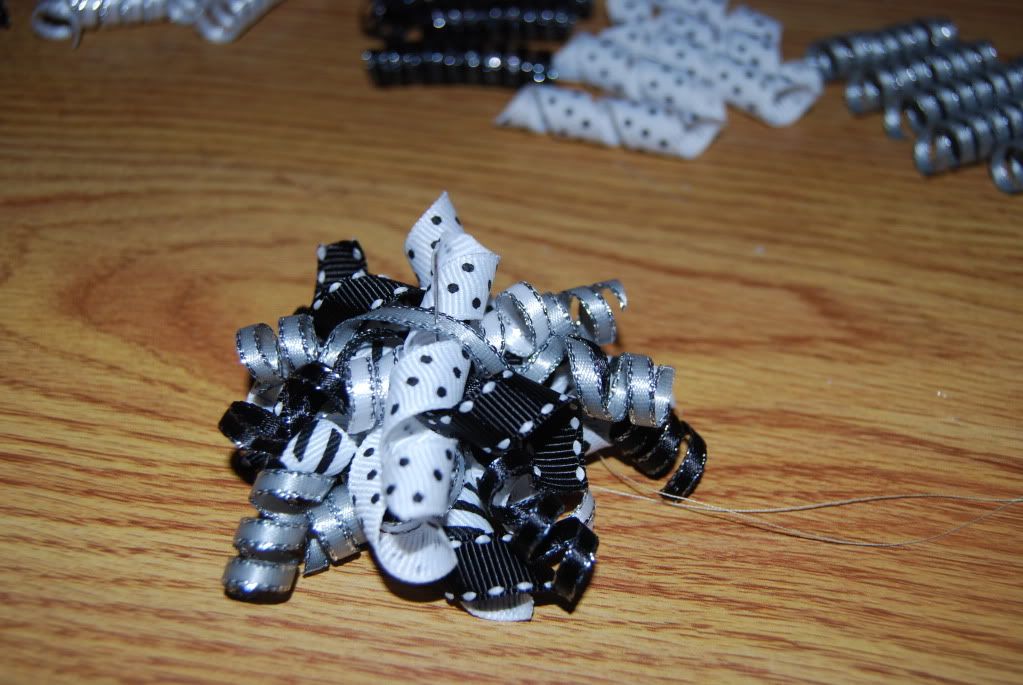
Step 6: Start with one uncorked piece of ribbon and then keep adding pieces of the corked ribbon one at a time onto the needle. Keep all the pieces on the needle instead of pulling it all the way though.
  
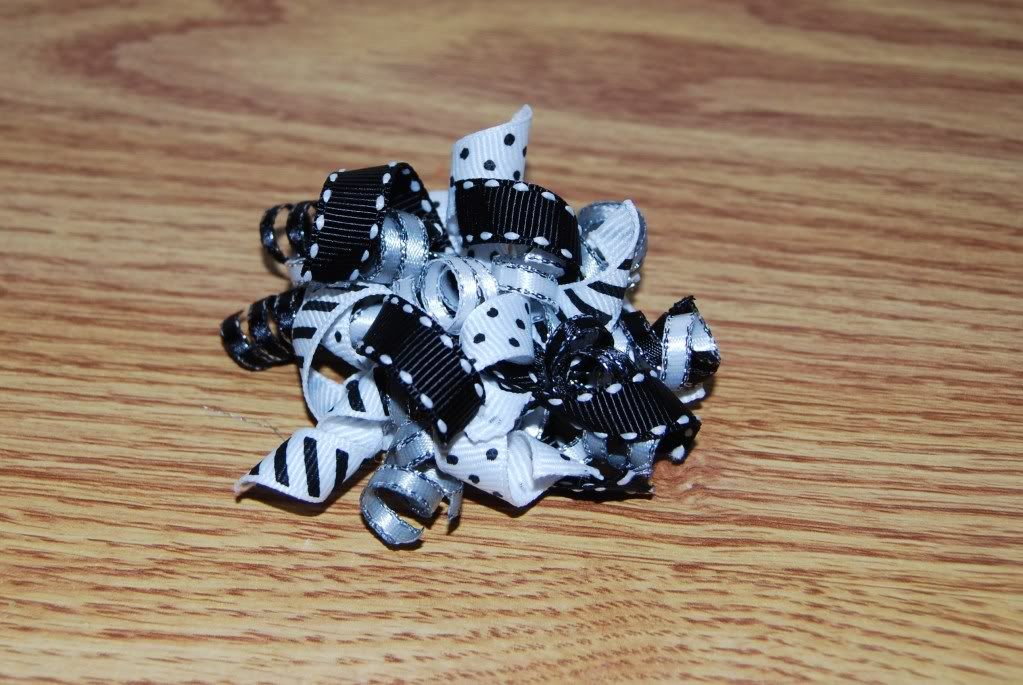
I like when things are more uniform so after I added one of each ribbon when I started the pattern over again I made sure that it went the opposite direction as the first time. (Making an X)  The third time through the pattern I laid  it half way between.  I stopped at 18 pieces but you may keep adding more until it is the fullness you desire.

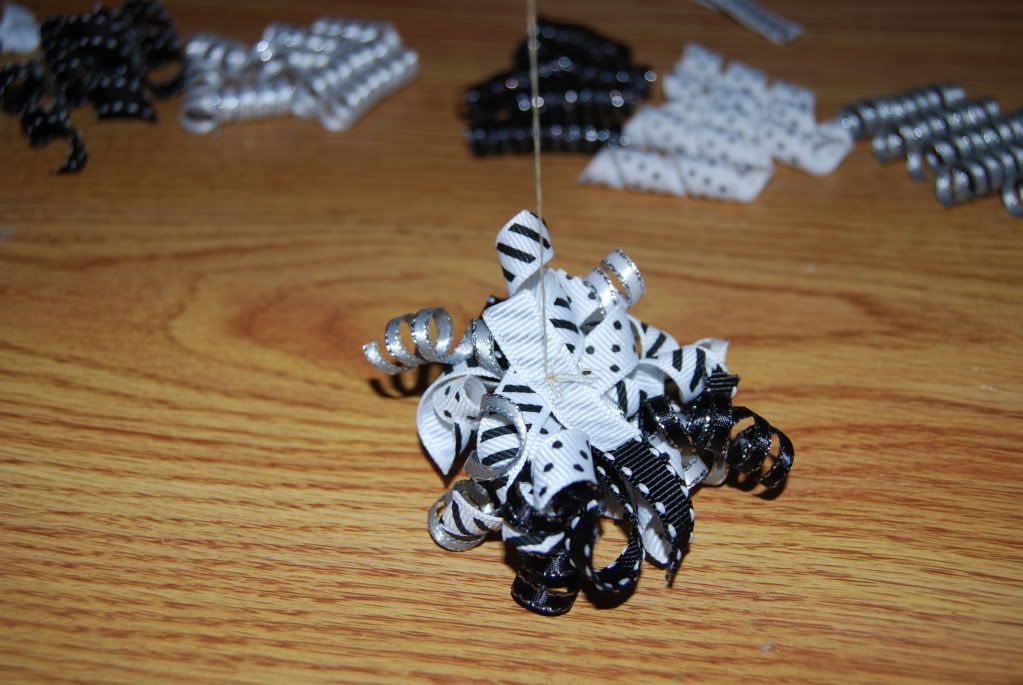
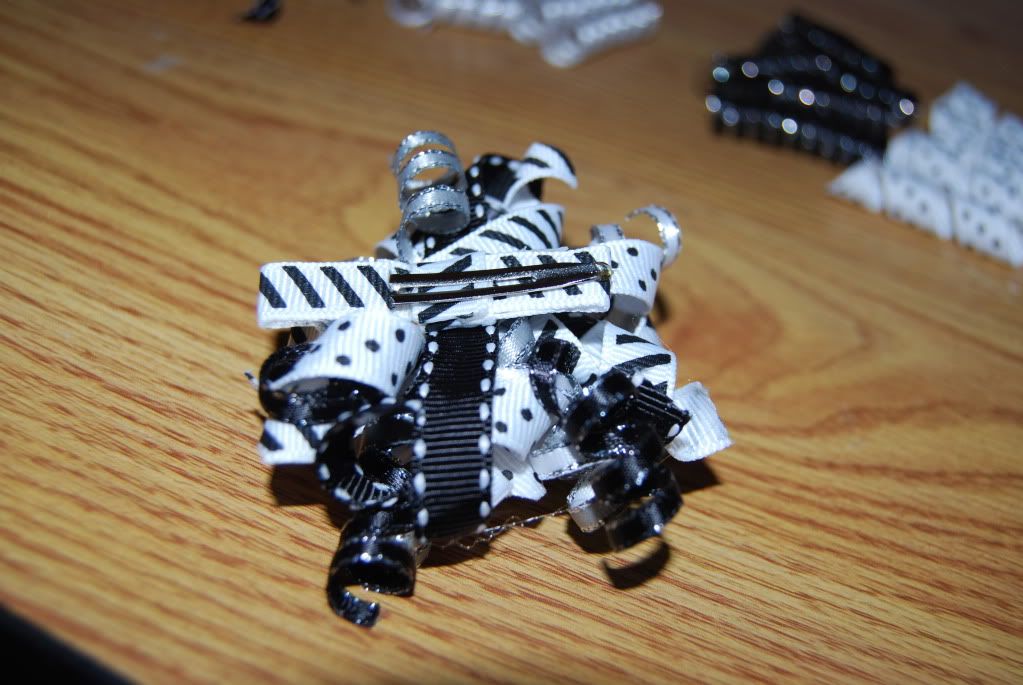
Step 7: Hold the center with your fingers and pull the needle through and then while still holding it in place stitch through it a few more times to hold it all together. Tie a knot on the bottom below the uncorked strip.
Step 8: Attach the bow to the hairclip by using a little bit of hot glue to wrap the uncorked strip around the alligator clip.


Friday, December 16, 2011

Gift Bow

I remember when I was younger I would always take the bows off of my presents and put them on my head. Okay, I confess. I still do this now at age 28.
Here is a quick way to make your own bows for all those presents you are wrapping this Holiday Season.
To make this 4 inch bow I cut four strips of ribbon 8 inches long, two strips that are 6 inches and one that is 2 inches. I used 7/8"  red saddle stitch grosgrain ribbon.
Loop the ribbon into a thin figure 8 shape. You will want the tips to come to somewhat of a point. Use a drop of hot glue to hold it in place.
Do the same with the remaining 8 and 6 inch strips. Make a ring with 2 inch strip.
Take 2 of the larger figure 8s and using a drop of glue in the middle make them into an X.  Repeat. Then do the same with the two smaller  figure 8s.
Begin to stack them and glue them together with the points facing towards the open spaces from the layer below.
Put one  more dab of glue in the center and place the ring/loop inside.
This bow could be attached onto a gift box just the way it is but because I like to find multiple uses for the things I make I added a lined hair clip to the back.
Now the recipient has a special hairbow to wear as a bonus gift or they can save the bow to reuse the next time they have a gift giving occasion.

Friday, December 9, 2011

Ribbon snowman

The supplies needed to make this cute little snowman are 3/8″ white grosgrain ribbon for the snowman body, 3/8″  brown for the arms, 5/8″ and 3/8″ black for the hat, 3/8″ ribbon of whatever color or design you would like the scarf.  I also used a thin white and silver ribbon to add some detail to the hat.  You will also need a glue gun, lighter, and whatever you would like to use your snowman on. I attached it to clothespin with a magnetic strip glued to the back so it can be used on the refrigerator.
To make the body cut 7  strips of white ribbon. Each strip should be a little bit smaller than the one before.  Glue each strip into a loop by overlapping the ends and gluing it into a ring or O shape. Use the largest loop for the body of the snowman and the second largest loop for the head. Place the other loops inside of each other. There should be a total of 4 loops for the bottom and 3 for the head. Hold it all in place by one drop of glue between each loop. The snowman body is now complete.  I then wrapped one small piece of ribbon around the center for extra support and to cover where all the loops were connected.
To make the scarf  wrap one ribbon around the neck making a loop with the overlapped ends towards the back. With a second strip of ribbon I cut the ends into a “dove tail”.  The easiest way to do this is to fold the ribbon in half lengthwise and cut in an angle from the folded side back to the ends giving a perfect V shape.  Fold the ribbon like you are making an awarness ribbon and glue it in place.
The arms are a 3/8″ brown ribbon cut in half lengthwise and then heat sealed with a lighter to keep it from fraying and then glue them to  the back of the snowman.  You can also heat seal the ends of the scarf if you wanted. If you don’t they will fray, but that is totally fine because it will end up looking like fringe on the end of the scarf and that would be really cute too!
To make the hat cut a small piece of 5/8″ black, heat seal, and then glue a 3/8″ strip on top to make the brim of the hat. I then glued on a small strip of decorative ribbon to add a little sparkle.
Then glue the hat on the snowman either right on top or off at an angle and you have a very adorable little snowman.
I glued a strip of the white ribbon onto a clothespin and then glued a magnetic strip to the back so it could be hung on the refrigerator. Other options are to glue the snowman onto a lined hair clip or attached to a wire or hanging ribbon to hang on the tree as an ornament.   You can use the snowman instead of a traditional bow on a present or clip it to a gift card to give to those hard to shop for people.

Friday, December 2, 2011

Decorated Formula Cans

I have recently finished breastfeeding my baby girl. We only made it 7 months but that was a huge accomplishment for me. Not only did I love doing it; I loved the money I saved. Now that we are using formula full time we have a lot of empty cans. Luckily, these cans can be used for so many things!
Supplies Needed:
  • empty formula can
  • a few different  ribbons
  • scissors
  • lighter
  • E-6000 glue (or a hot glue gun)
Step 1:
Peel the paper off the can and wash it out. Do not put it in the dishwasher.  Dry it very well or it will rust.
Step 2:
Chose the pattern in which you would like on the can. I am making a Christmas theme so I chose ribbons with red and white and one with Ho Ho Ho written on it.  Wrap the ribbon around the can to determ the length (or use a tape measure) and then cut all your ribbons to that length. Heat seal the ends by running a lighter very quickly over the ends. You will see it melt a little bit. Don’t hold it too long or your ribbon will catch on fire.
Step 2:
Starting at the top and bottom of the can glue the ribbons on one at a time working your way to the middle. I chose E-6000 glue because it holds really well and doesn’t leave a stringy mess like my glue gun does. I put the glue where the ends will meet and a few random times around the can just to keep it from sliding around. 
 
Overlapping is okay if you ran out of space!
Step 3:
Add more ribbons to cover your ‘mistakes’. (There really are no mistakes while making this project!!)  If  you like the way your can is looking now you can skip this step.
 I knew I would be able to see where the dried glue is beneath the white satin ribbon and I dont like the way that looks.   I used it anyway because I wanted to use it as a border around the Ho Ho Ho ribbon.
 If you had to overlap in the middle, place another ribbon overtop to hide that. The solid red I used is actually the back side of  the Ho Ho Ho ribbon.
Step 4:
Cut one more peice of ribbon to cover all the ends. Heat seal the ends and glue in place.
Step 5:
This would be where you fill your can with holiday goodies to give to a friend. Or cut a slit in the lid to use as a piggy bank. Or put it on your desk as a cute pencil holder. I keep one on my washing machine to hold little things I find in pockets when I’m doing laundry.
There are so many things you can do. I would love to hear what you are going to do with yours!